Using the audriga email migration service you can easily transfer existing emails and folders from your old provider ("source account") to a new provider ("destination account").
Preparation
Please make sure you have the account credentials (username and password) for your source and destination email account at hand. We recommend that you set temporary passwords for the time of your migration.
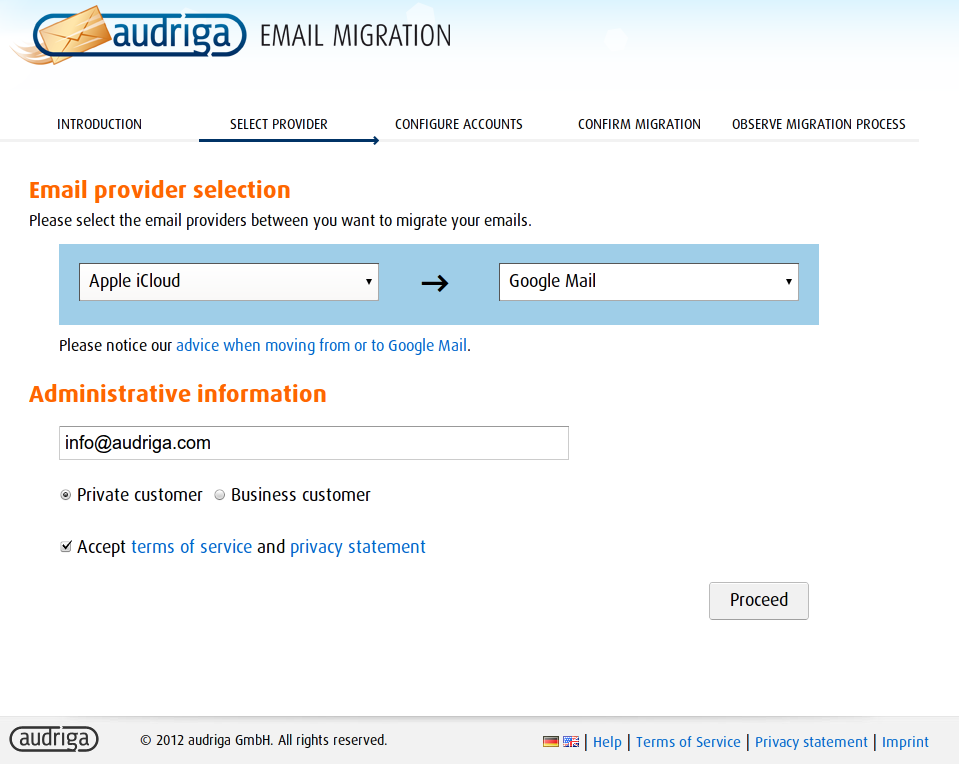
Selection of your current and new email provider
Select the email provider of the source and destination email account between which you want to migrate your emails. If your provider is missing in the list, please select "(Other provider)" and enter its data in the following screen. Please enter an email address to receive status updates from our service during the migration process. Check the terms of service and the privacy statement before proceeding.
Enter email accounts
Click "Add account" to add an email account for migration.
![[1]](https://www.audriga.com/fileadmin/img/howto/email_howto_konten_en.png)
This will open a dialog which allows you to enter username and password for the source and destination account. Click "Check" to see if the provided credentials are correct. After a successful check, click "add" to confirm.
![[2]](https://www.audriga.com/fileadmin/img/howto/email_howto_eingabe_en.png)
Start migration
The following screen shows a summary of your configuration. To pay for the migration, you can either either use Paypal or enter a voucher code. Then click on "Start migration" to proceed.
![[3]](https://www.audriga.com/fileadmin/img/howto/email_howto_start_en.png)
Monitor migration process
The final screen shows the progress of your email migration. It may take a while until the migration is started. Also note that migrating large volumes of data may take some hours. You will receive a status email when the migration process starts and after it has finished. This email also contains a link to the status website.
![[4]](https://www.audriga.com/fileadmin/img/howto/email_howto_status_en.png)